This is a step-by-step Aweber tutorial on how to use their email marketing software to build your email list, create email automation campaigns to engage your new subscribers, and more.
Let’s get started.
How to create your email list and set automation email campaigns with Aweber?
Step #1: Create Your Aweber free account
To start building your email list with Aweber, you first need to create an account with Aweber.
So if you don’t have an account yet, click on the button below to create your free account first.
In case you want to learn more about Aweber, check out my Aweber review here or the free version review here.
If you already have an account go to the next step.
Step 2: Create your email list
The next step in this Aweber tutorial is about building your email list.
If you don’t know what an email list is…
An email list here is where your new subscribers or leads will be stored. It is a way to segment your audience.
Par example if you have 2 mini-courses: one about email marketing, and another one about e-commerce, you can create 2 different lists respectively for your 2 mini-courses. This way, People who join your eCommerce mini-course will be added to your e-commerce mini-course list. The same goes for those who will join your affiliate marketing mini-course.
Note: Note if you are using the Aweber free plan, you can only create one email list.
Now you may be wondering how to create your email list.
Here we go!
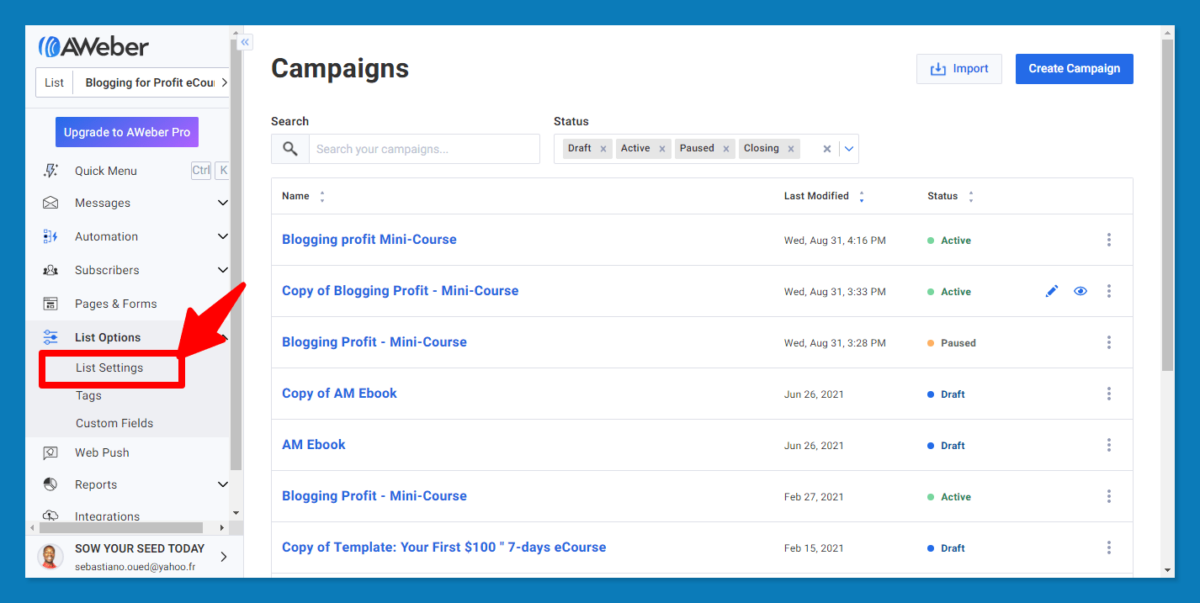
First off, log in to your Aweber account. Once in your dashboard, go to “list options” and then choose the “list settings” option (take a look at the image below).
This action will take you to a page where you can provide information about the current list, your company, etc.
For example, you can give your list a name (based on your email campaign). I name mine “Blogging for profit eCourse” because this list is for my blogging free course email campaign (take a look at the image below).
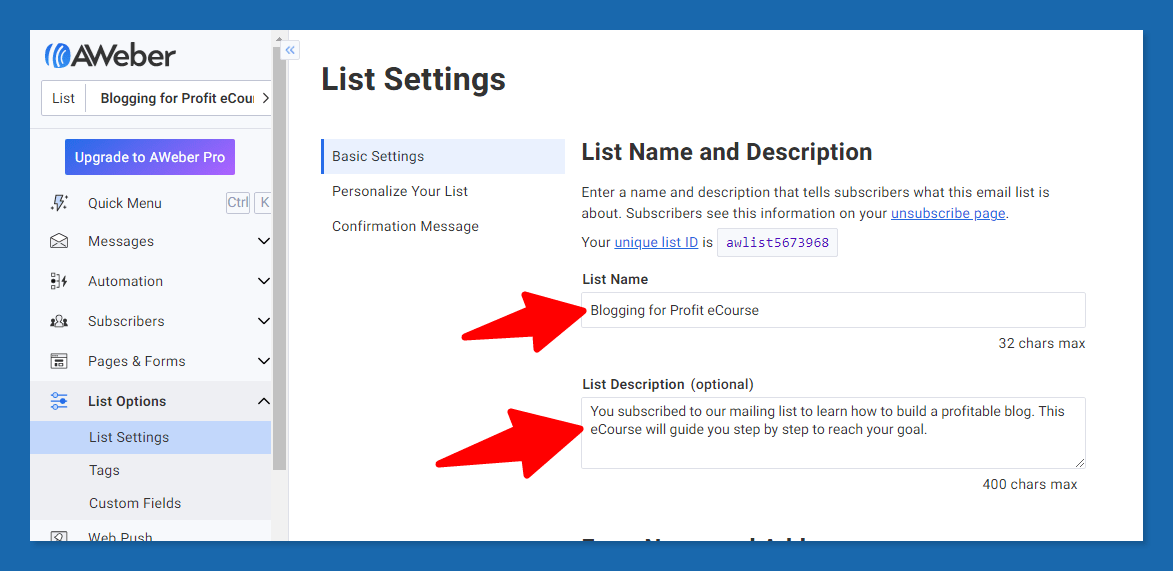
You can also give a description of your list. This is optional but useful as it will help your subscribers to know what to expect from your list or email campaign.
This short description will be included in all your email. So it also helps your old subscribers to know how they came to your email list. That can prevent them from reporting your email as spam.
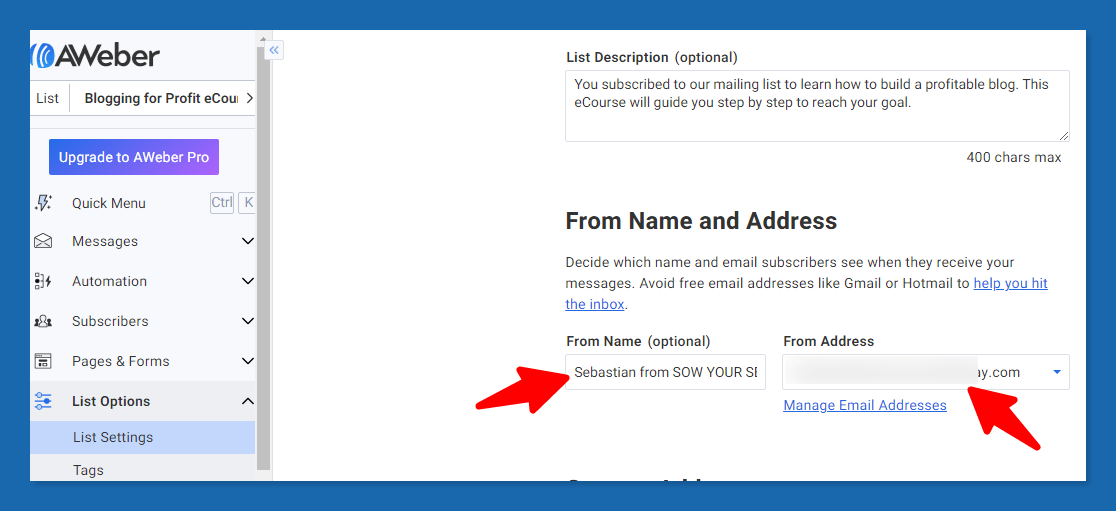
The last and not the less section on this page is the “from name and address” section.
This is where you can tell your subscribers who you are or who are sending them emails.
Here you can use your company name or your name.
Personally, I use my name plus my company name instead of using only my name.
In this section, you are required to provide a professional email address.
If you are using a platform like Wealthy Affiliate, you can create a professional email address for free.
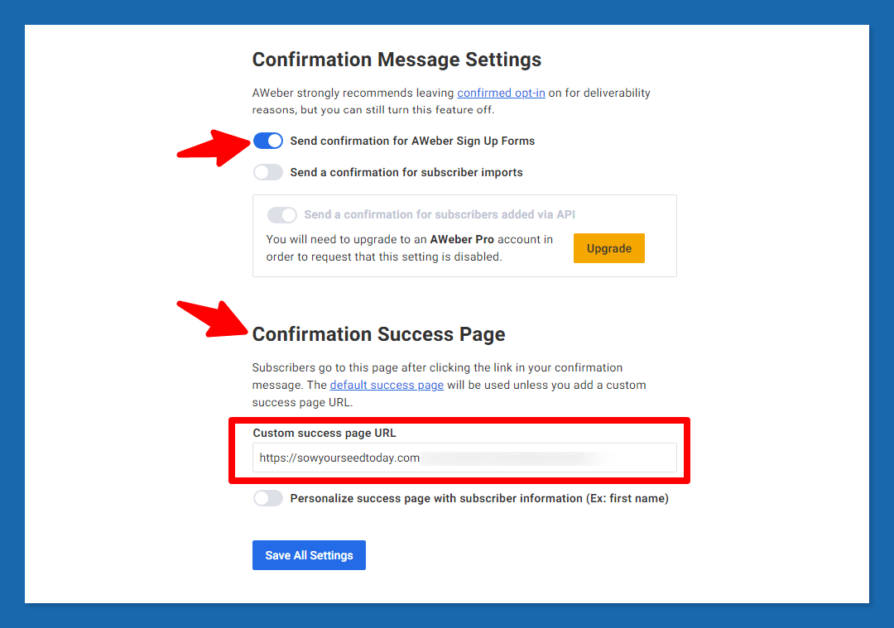
Side note: If you want to create redirection to a specific link like a bridge page, or an affiliate link when your subscribers verify their email, you can go to the confirmation message section, and then add that link there.
Step 3: Create your opt-in form or landing page
The next is to create your opt-in form or landing page. This is where your visitors will be able to join your list.
In this tutorial, we will create a simple opt-in form.
For that go to the “pages and forms” section. Then select the “sign up forms” option.
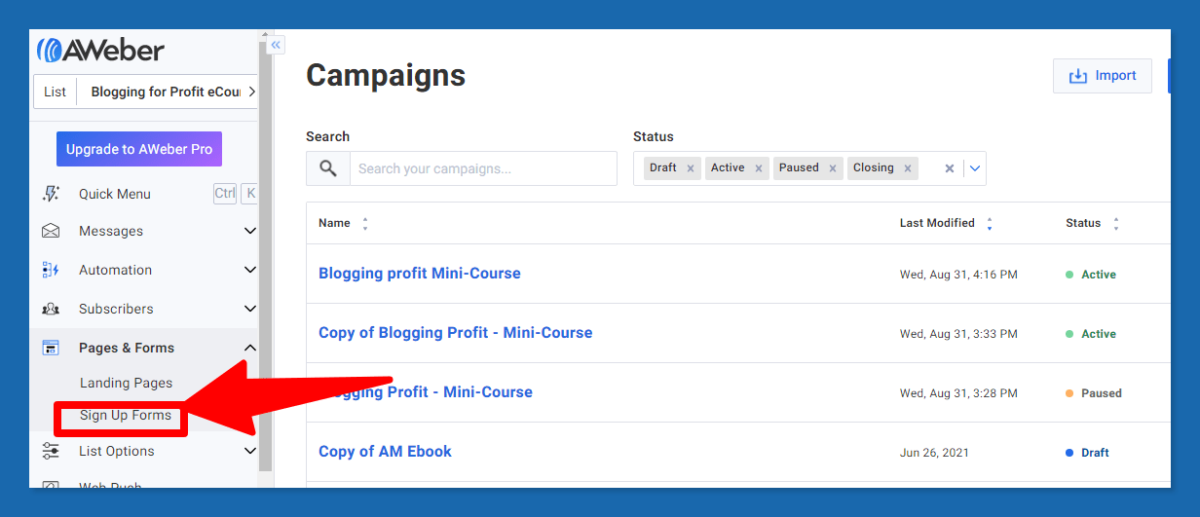
That will lead you to the page below.
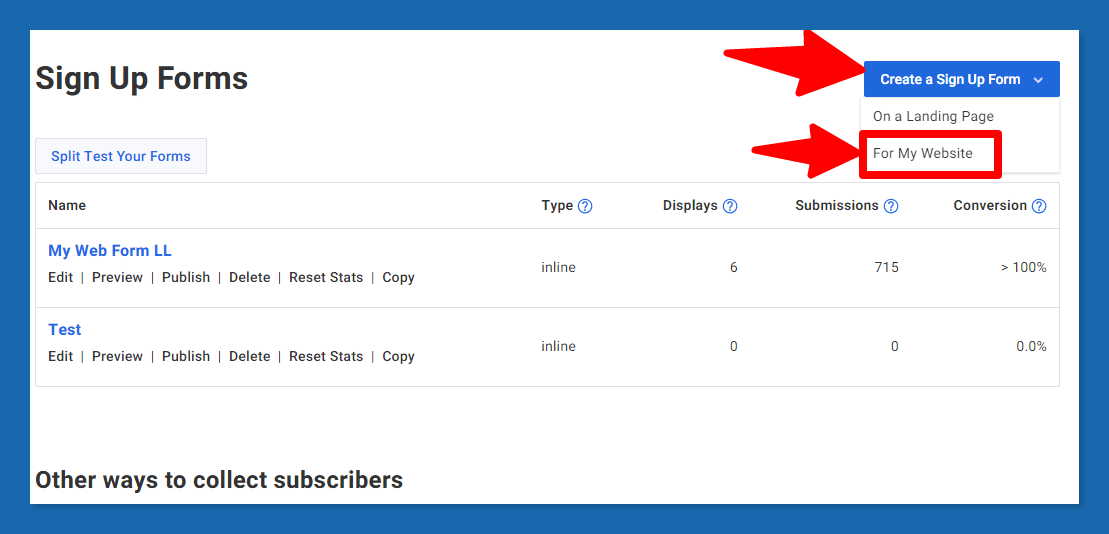
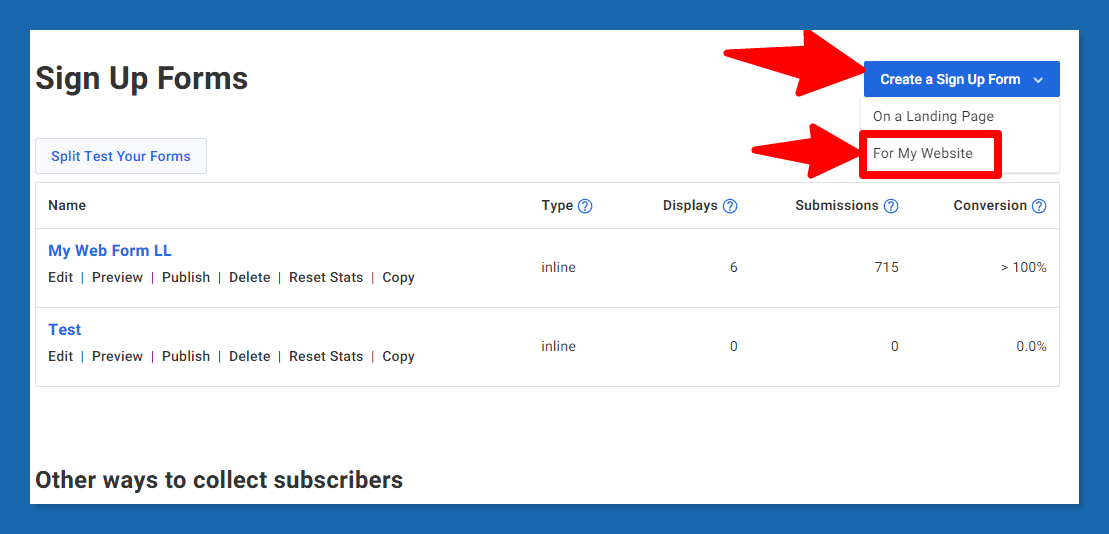
From here click on the button, then select the “for my website” section.
From here you can select your favorite opt-in form template, and then customize it as you wish.
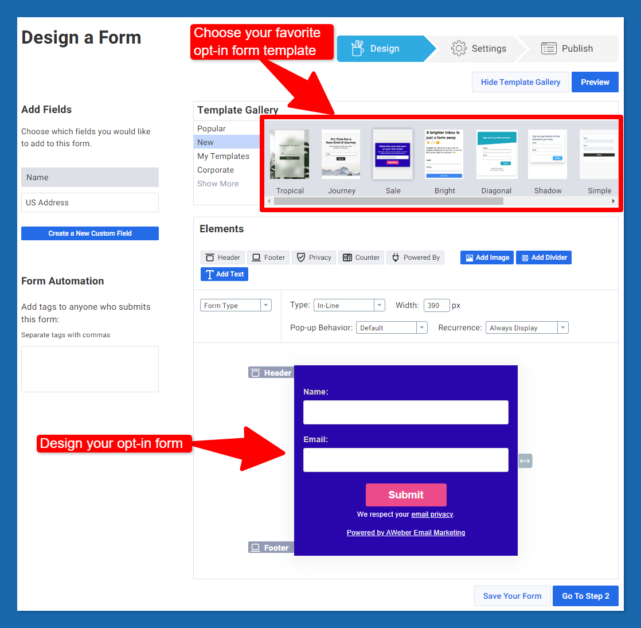
Once you have finished designing your opt-in form, click on the “go to step 2” button.
That will lead you to this the page below.
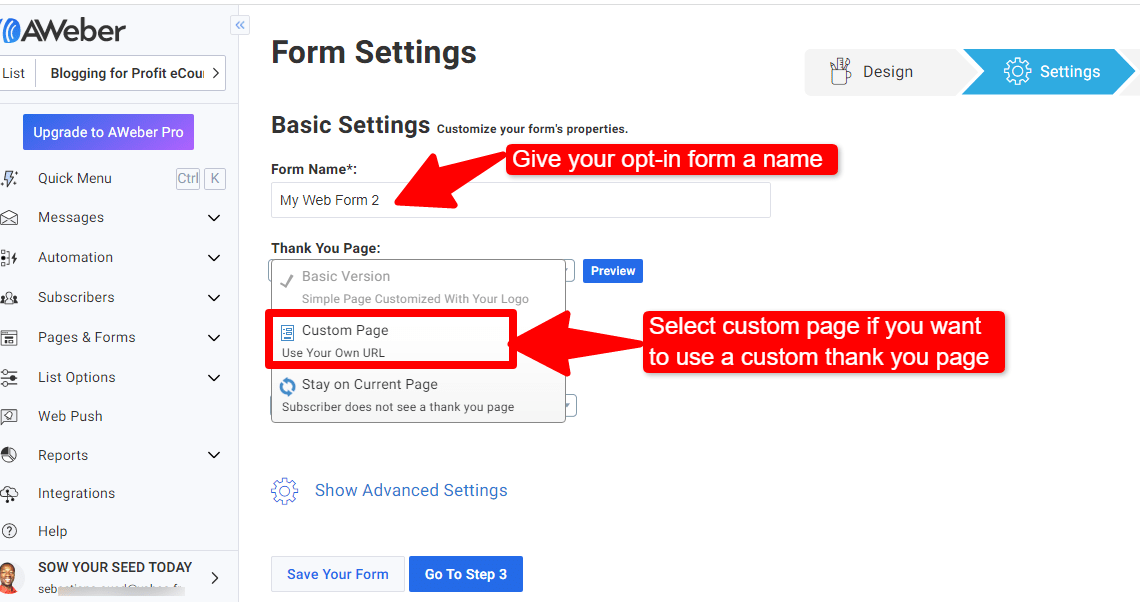
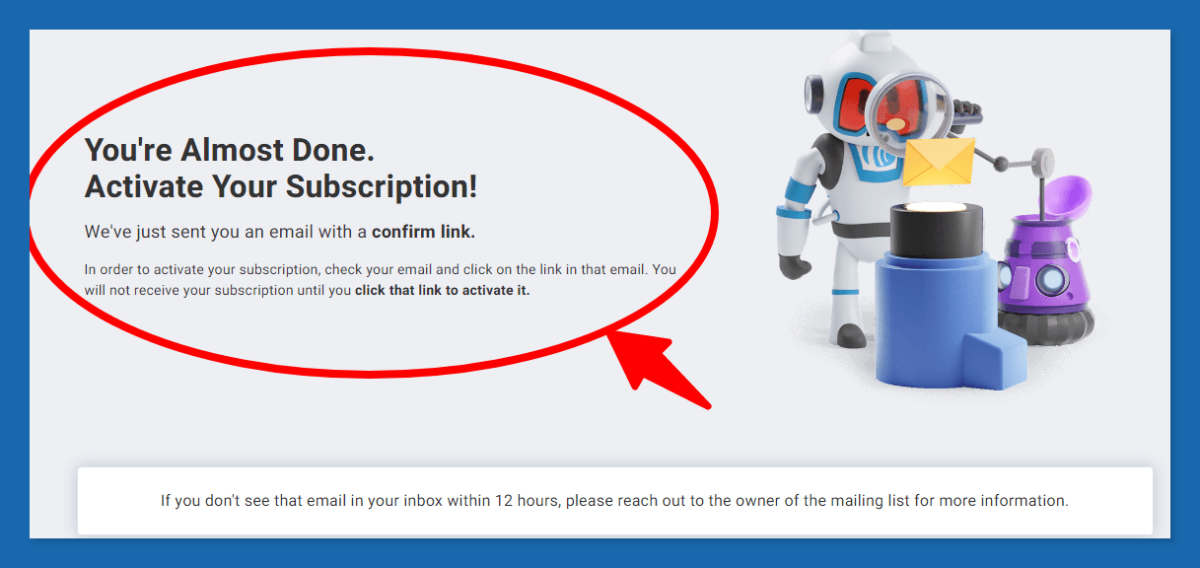
From here you can give a name to your opt-in form. If you don’t want to use Aweber’s basic thank you page, which looks like the one below, you can click on the custom page section to use your own custom thank you page.
Once you have done with this step, click on the “go step 3” section.
That will lead you to the page below.
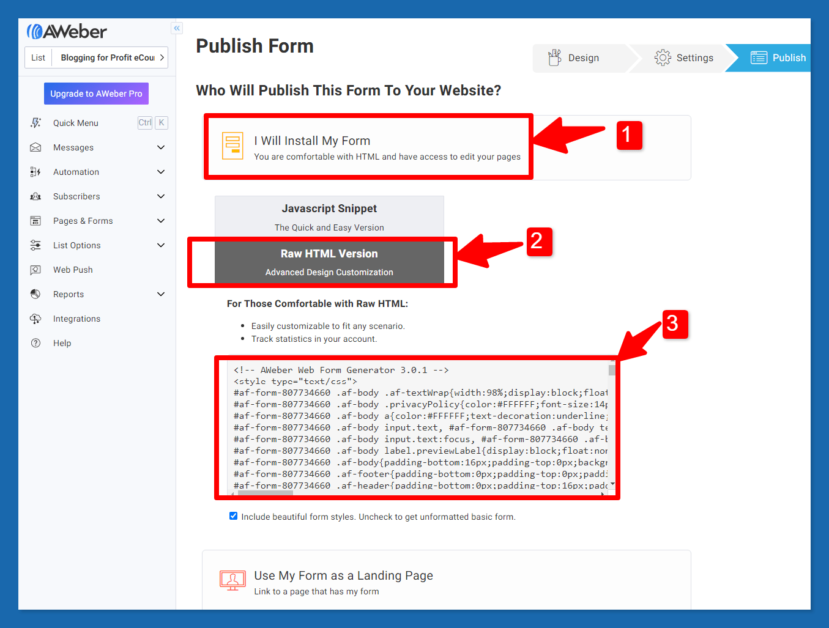
From here click on the “I will install my form” option. Then the “raw HTML version”. Finally, copy the HTML code below (3).
This is the code you should use on your website to collect your visitors’ email addresses.
If you want to learn how to integrate it with Leadsleap, check out this guide.
Step 4: Create your email campaign
The number 3 step on how to use Aweber is about building your email campaign.
In case you don’t know what an email campaign is…
An email campaign is one email or a series of emails sent to your new or old subscribers during a specific time frame to achieve a specific goal.
For example, if you are running a 5-day mini-course, your email campaign should have at less 5 emails which should go out on a timed basis: either one email per day for 5 days or 1 email every 2 days for 10 days.
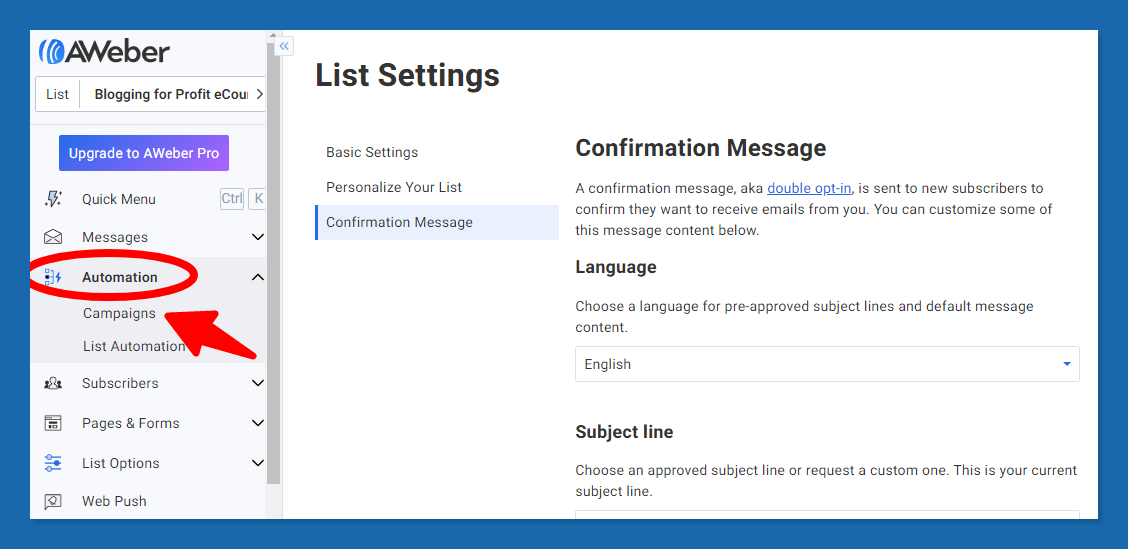
To create your email campaign, go to “automation” and then click on “Campaigns”. Take a look at the image below.
That will take you to a new page. On this page, click on the blue button where it says “create campaign”.
This action will take you to the page below.
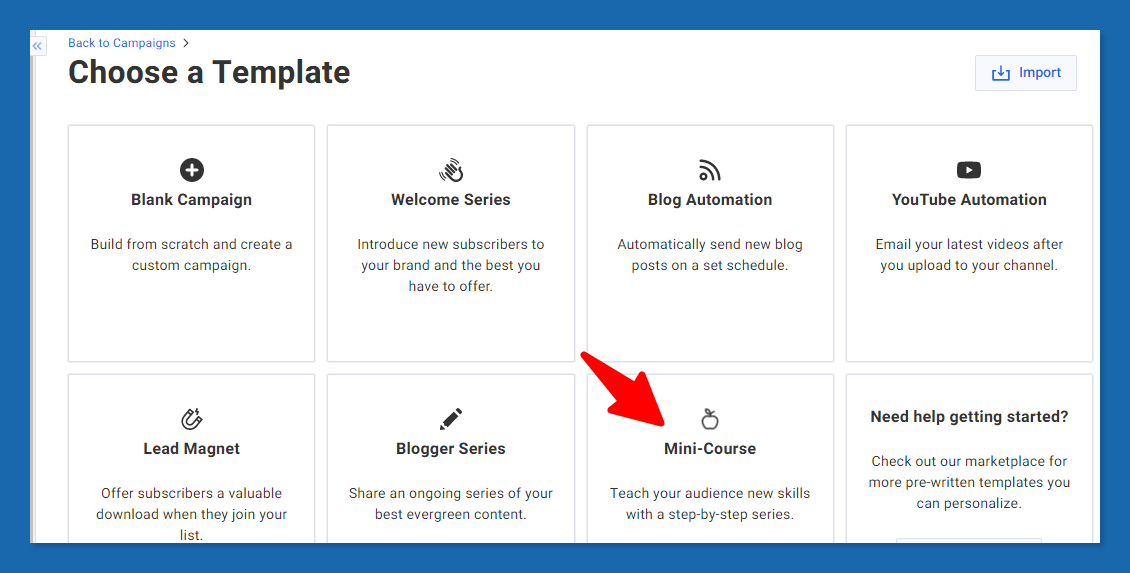
From here, you can start by selecting an email campaign template or by starting with a blank campaign.
The great thing is that Aweber categorized the campaign templates.
For example, if you want to create a mini-course email series, you just have to select the mini-course campaign template.
This is how the campaign editor looks like. You can drag and drop elements in the editor.
For example, if you want to add an email, just drag and drop the “send message” in the actions tab.
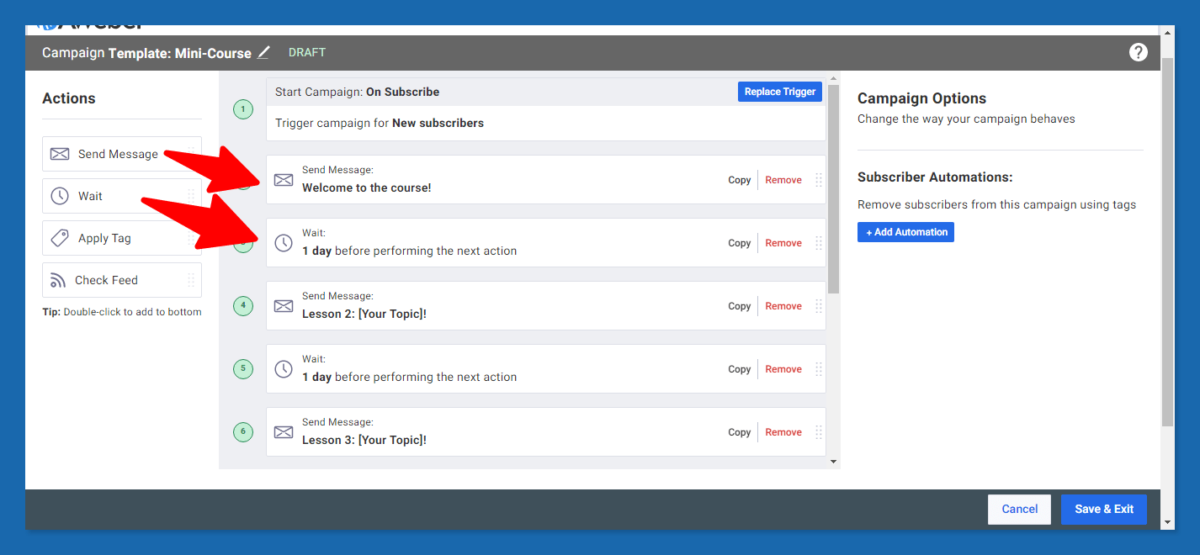
Here you just have to edit your email content and set the time frame you want each email to be sent.
For example, your email campaign can look like this:
Day 1 – Welcome to the affiliate marketing course. Intro about+ Course overview.
Wait for 1 day
Day 2 – Lesson 1: What is affiliate marketing + its benefits
Wait day 1
Day 3 – Lesson 2
Wait 1 day…
Once your email campaign is complete and ready, click on the “save and exit” button below.
That will take you to the page below.
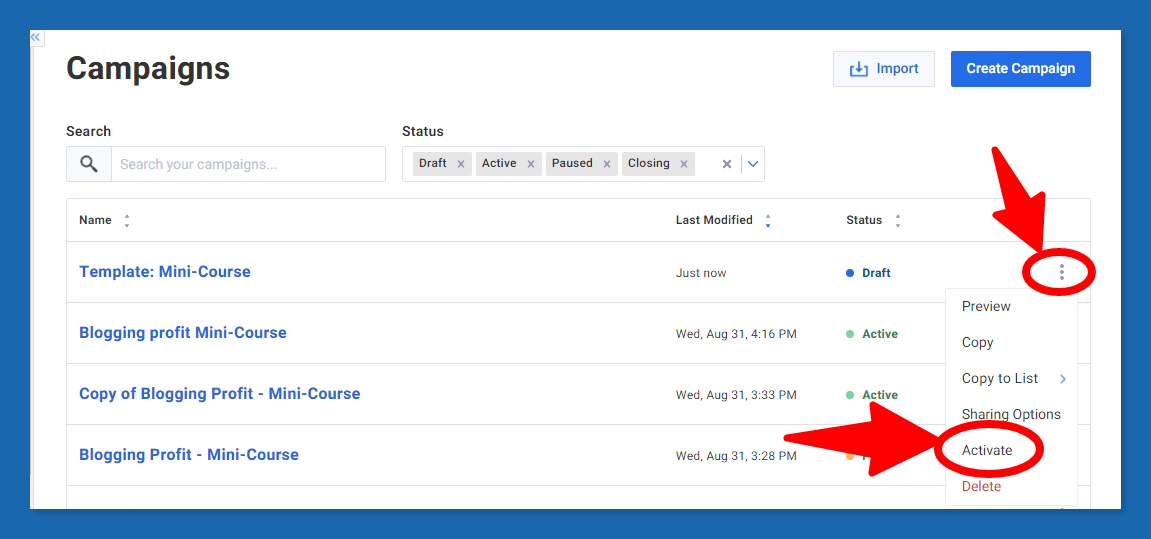
From here, click on the 3 dots near your campaign and then click on “activate” as outlined above to activate your campaign. That it is!
I hope you found this Aweber tutorial helpful.
If you have a question, drop it in the comment below.
To Your Success!
Be an ACTION taker, SOW YOUR SEED TODAY!

How To Choose The Right Sales Funnel Builder Software For Your Business (10 Factors To Consider )
Systeme.Io funnel builder – How to build a lead & sale funnel with Systeme.io?
Top 7 best email marketing tools for 2025 (for bloggers and small businesses)
Top 5 Best ClickFunnels Alternatives For 2025 (marketing automation tools)
